
|
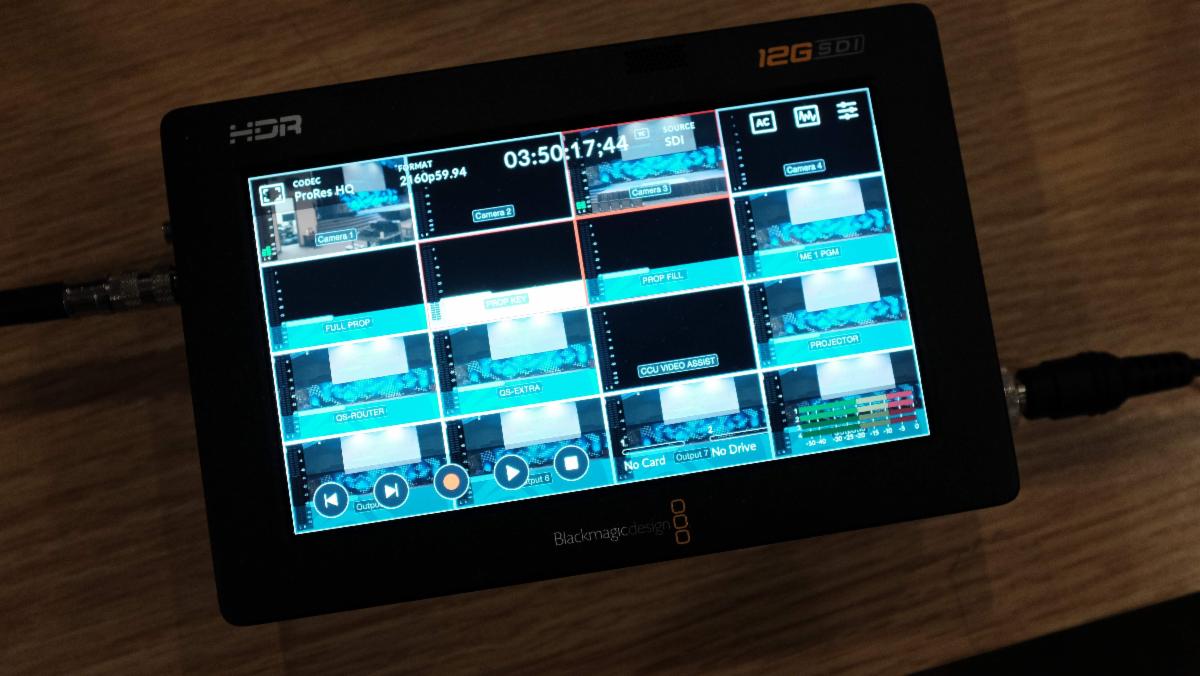
Introducing a new favorite on the market: The Blackmagic ATEM Mini Extreme ISO! This a low-cost, multi-camera, live production with advanced broadcast features, compact switcher. ATEM Mini switchers (Atem Mini and ATEM Extreme pictured above) make it easy to create a professional multi camera production for live stream, business presentations, or podcasts. You might already know that the ATEM Mini models have a USB so you can use any streaming software, but the ATEM Mini Extreme also adds live streaming and recording to USB disks. It also has an additional 8 HDMI inputs, 2 separate HDMI outputs and a Multiview with up to 16 views.
0 Comments
Luminance and Pattern Keys Keying is a powerful and essential feature on your video switchers. It's important to know the basics behind keying so you can really understand what is happening on your switcher when you use these features. We've talked about Chroma Keys, HERE, so now we want to highlight another similar switcher key: Luminance Keys.
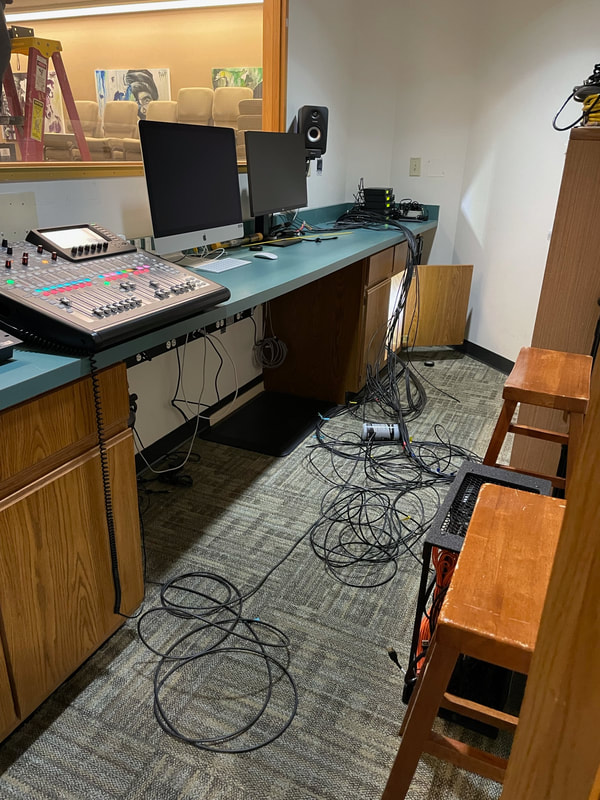
Running from the Constellation we have 2 eight lane fibers, one going to the Broadcast room and one to the video studio. With fiber, there is no need to worry about any issues with the length of your run, as you might have to think about with SDI and HDMI. Fiber is also able to support 4k 60/12G making it a great option for making sure your system is future proof. These lines are run through Blackmagic fiber converters to convert the signal to SDI, giving four inputs and four outputs to and from the switcher in both the broadcast room and studio. One of the greatest features of the Constellation is that all the outputs on the switcher are fully routable Auxs’. That means that outputs from the switcher to the broadcast room and the studio can be used to send multi-view, program, graphics inputs, camera control, or any other content that needs to be fed to the switcher. MSC already had 4 BMD Broadcast cameras so with 4 inputs in the studio all of them can be utilized at the same time if the situation calls for it.  With the studio, we also built out an entirely separate audio system that also had some integration into the sanctuary. In an effort to make onboarding and training new volunteers simple, MSC had already made the decision that they were going to have all of their audio systems, other than the main auditorium, be by Allen & Heath. In the broadcast suite, we put an A&H SQ5 and paired it with an A&H AR2412 digital stage box in the video studio. This gives them very flexible I/O and even the ability to do a full band in the studio space if necessary. Also, in the studio are 4 Shure BLX mics, both lavalier, and handheld. For the last piece, for monitoring in the broadcast suite, we put a pair of Presonus E44 studio monitors at the audio desk and a pair of Presonus Eris E3.5 for the video desk.
Between the first install at MSC and the studio build, MSC has a lot more room and capability to create more professional video content for their growing online needs! Not only does their new set up help them successfully produce content now, but offers further options for them to continue to expand in the future.
 Continuing in our series about video switchers, I wanted to speak on a topic that is seldom completely understood but is powerful and a fundamental feature. Let’s talk about Keying! Keying is the act of placing one video source layered over another. When most people think of keying, the example that comes to mind is usually a weather channel chroma key. What they might not know is that there are several different types of Keys. The types of Keys we are going to cover are Chrominance Keys, Luminance Keys, Linear Keys, Pattern Keys, and DVE Keys. Each type of key has a different use and can help your production in different ways. The first Key we are going to cover is a Chrominance Key or more commonly known as a chroma key. The most common place to see one of these is the weather segment of the news. Color replacement is the basic theory behind this key. To set up a chroma key you must place a person or object in front of a solid color, such as the commonly used bright green or blue backgrounds. We then can use the controls of the switcher to select the color we want the switcher to replace with a secondary image. Typically, a video switcher will possess a number of options for you to adjust including hue, gain, Y suppress, and others. The important piece of information to remember here is that a switcher will only pick one color and a small range around that color for recognition. So, lighting is particularly important to keep the color consistent for your switcher to see. Chroma keys are not just for weather reports but to set up interesting interview backgrounds for podcasts and other online events. If you set up a different chroma key, say one for each of your three cameras, you can create the illusion that you are cutting around a virtual set. Another use for this type of Key might be for putting lyrics on a stream. If you connect a graphics source, such as Propresenter, and put white text over a green colored background you can have the switcher remove the green color and layer the text over your video. Another great thing about using a chroma key is that it allows you to keep a thin outline, such as a black line around white text, for easy readability. If you need help setting up a chroma key or ideas on how to better use one for your production or stream, reach out and drop us a line!
 If you, like many over this last year, are new to pro video switchers, their terminology, and features you may be wondering about ME’s. ME’s are where the magic happens in video switchers and are comprised of controls each with a row of buttons for Preview and Program. Program is the video source you are sending out and Preview refers to the video source you are intending to transition into next. Let’s start by talking about what ME stands for. An ME stands for Mix Effects Bus. To understand what this is we will break down each word. First, we can start with M or Mix. Mixing is the combination of two or more elements. At its most basic function, a video switcher does just this by mixing different sources such as multiple cameras or a GFX source. 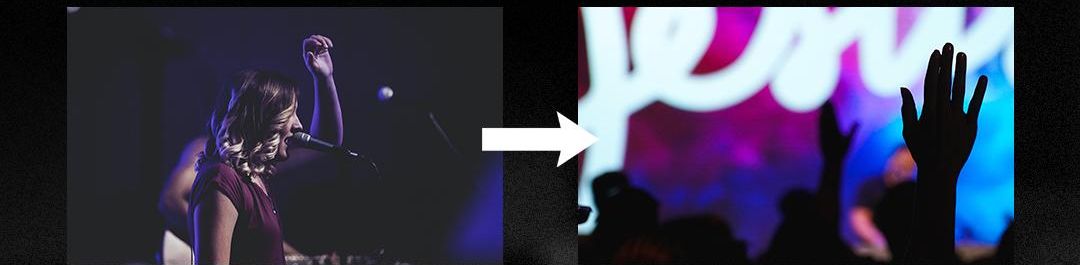 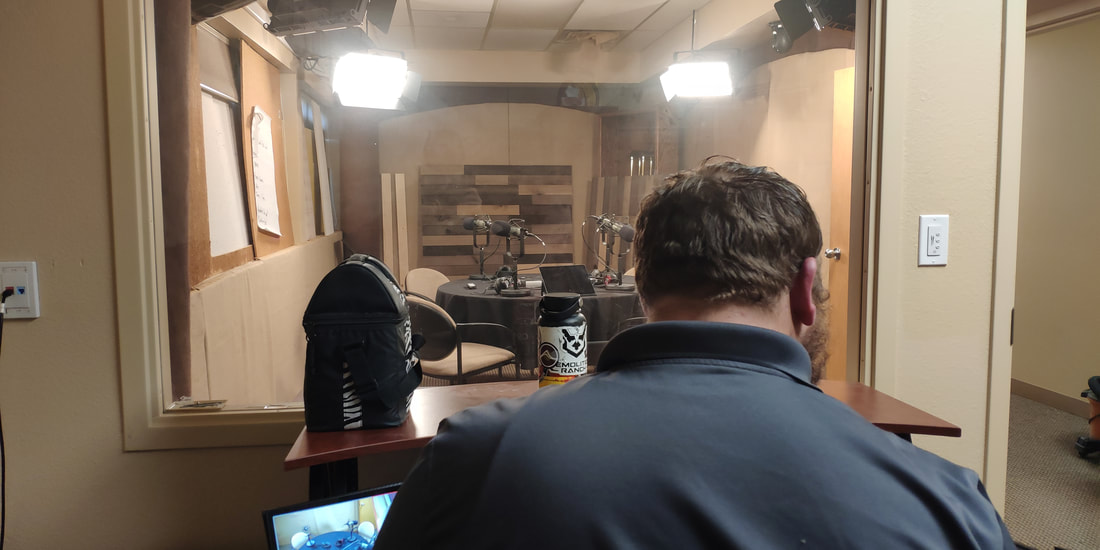 Last year brought a lot of change in how and where we work. I’m sure at some point or another we all took a turn working from home or had an increase in virtual meetings. Either way, we’ve already seen businesses using more remote options and relying on audiovisual equipment even more. We don’t see remote business options going away any time soon as people are finding them quick and convenient. So, how do you know if your meeting rooms or huddle spaces can keep up with your needs? The great news is that as the AV industry advances there are lots of easy-to-use, affordable options to give you the right components to create your ideal meeting space. We work with schools and businesses to make sure their specific needs are met.
Compression on a vocalLast week we had an introduction to audio compression. Today let's take a look at why you might add compression to vocals! For speaking vocals, I rarely use any compression. The main reason for this is that you will lose some of the dynamics and if you are not careful it can make them sound very unnatural. On the other hand, for singing vocals, I love being able to use compression! If I have a console that will allow me to, I like to do two stages of compression. For the first stage, I like to use compression as more of a soft limiter (somewhere in the 7:1-10:1 ratio) with a pretty high threshold. Most of the purpose of that compressor is to trim the loudest part of the vocal. Then I use a second compressor to “squish” the rest of the vocal a little bit (Ratio 2:1-3:1, a medium threshold (3-6db) ) and to make-up a little bit of gain to keep my gain structure correct. My main goal, as with any compression is to try and get the vocal more consistently coming out of a PA or on a stream. But, this doesn’t mean that it’s always the right choice! Sometimes adding a compressor to a singing vocal or adding too much compression can make a vocal feel un-natural or thin. So, use with caution and always mix with your ears and not your eyes!
Trevor- Lambda Audio Visual Sound Engineer |
AuthorsAll of the Lambda Staff contribute to the Blog. If you have any questions about the info we provide, please don't hesitate to ask! ResourcesCheck out our resources page for FREE checklists and tools we mention in articles! We are here to help you improve and maintain your Audio Visual Systems!
Categories
All
|

 RSS Feed